-
Step 1: Match the Machine to Your Output Volume
-
Step 2: Learn the Cutting Sandwich Before You Buy Dies
-
Step 3: Build Your Die Library with Strategy, Not a Shopping Spree
-
Step 4: Calculate Cost Per Ornament, Not Cost Per Die
-
Step 5: Create a Die Storage and Tagging System Before You Need It
-
Step 6: Test-Cut Every New Die with Your Standard Papers
-
Common Mistakes and Honest Limitations
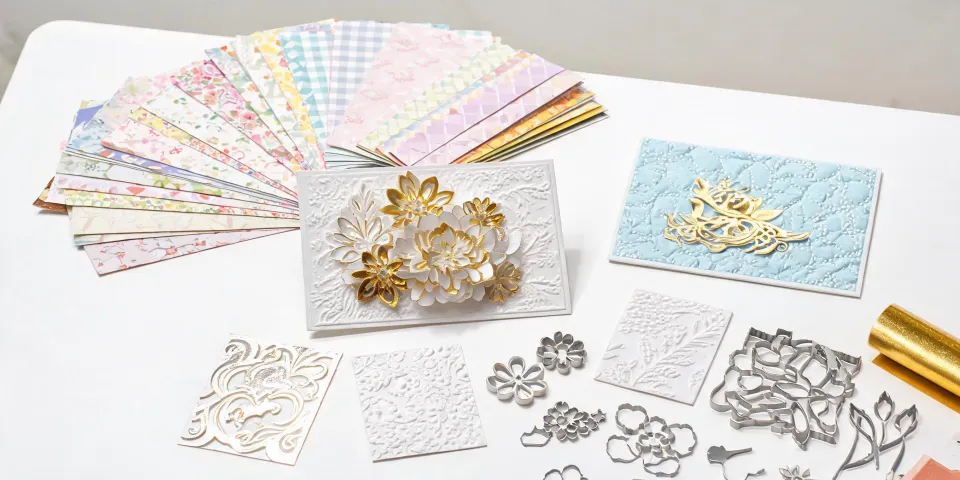
Look, I'm not a craft blogger. I'm a procurement manager at a 12-person gift production company. I've managed our craft equipment budget—roughly $45,000 annually—for six years, negotiated with 30-plus vendors, and documented every order in our cost tracking system. When we decided to bring greeting card and Christmas ornament production in-house, I was the one who had to figure out which Spellbinders die cutting machines were worth the money and which would end up gathering dust.
This checklist is for small business owners, craft retailers, and serious hobbyists who want to buy smart instead of buying a lot. Six steps, most taking less than five minutes. Work through them in order and you'll skip the mistakes I made.
Step 1: Match the Machine to Your Output Volume
Here's what most people get wrong: they buy the biggest machine they can afford, not the one that matches their workflow. Spellbinders has three main lines: the Platinum series, the Grand Calibur, and the Scout. The Platinum handles thicker stacks and larger dies. The Grand Calibur is a workhorse for thinner materials. The Scout is the compact option for smaller projects and scrapbooking.
Before you look at prices, write down three numbers: how many pieces you produce per month, what materials you'll be cutting (80 lb cardstock, 100 lb cover, felt), and your average die size. If you're producing under 500 pieces a month with mostly 3×5-inch dies, the Scout might be enough. If you plan to run small production batches or cut 5×7-inch designs, step up to the Platinum.
I went back and forth between the full-size Platinum and the compact Scout for two weeks. The Platinum offered more capacity; the Scout was cheaper and portable. On paper, the Scout made sense for our satellite studio. But production volume was trending up, and the price difference between the two was smaller than the cost of buying a bigger machine later. In the end, I chose the Platinum. No regrets.
Step 2: Learn the Cutting Sandwich Before You Buy Dies
If you're learning how to use metal cutting dies for scrapbooking or card making, this is the part that trips everyone up. Every die needs a specific "cutting sandwich"—the stack of plates that goes through the machine. Get the stack wrong and you'll tear your paper, dull the die, or convince yourself the machine is broken.
The standard sandwich for most Spellbinders machines is: cutting plate, die with paper on top, then another cutting plate. But each machine model has its own recommended stack, and some intricate dies—especially holiday figurine designs—need a shim or adapter plate to cut cleanly.
Here's the thing: this is the step most people skip, and it causes the most frustration. When someone says "my die isn't cutting through," 90% of the time it's a sandwich problem, not a machine problem. Read the manual that ships with your machine. Write the correct sandwich sequence on a sticky note and attach it to the machine. That fifteen seconds of setup saves hours of troubleshooting.
Step 3: Build Your Die Library with Strategy, Not a Shopping Spree
This is where costs really add up, and where I have the strongest opinions as a cost controller. The die cutting machine is a one-time purchase; dies are an ongoing expense. If you're not intentional, you'll end up with 200 dies you used once and a blown budget.
My rule is simple: buy dies for products you've already validated, not for products you hope to sell. When my company started producing Christmas ornaments, I didn't buy every holiday die in the catalog. I identified three best-selling ornament shapes from our market research, matched them with available Spellbinders dies, and bought only those.
That said, some collections deserve an exception. The Spellbinders City Holiday collection has a cohesive design language across its holiday figurines and Christmas ornaments. If you're planning a seasonal product line, a themed collection makes sense because the pieces work together. A single holiday figurine die that produces one design is a hard pass for me. A collection that yields ten coordinated designs—and lets you mix-and-match across ornaments, cards, and gift tags—is an asset with real return on investment.
Step 4: Calculate Cost Per Ornament, Not Cost Per Die
Here's where a procurement mindset pays off. Instead of asking "how much does this die cost?", ask "how much does this die cost per ornament it produces?" That's the total cost of ownership calculation most hobbyists never think about and most retailers should never skip.
In Q2 2024, I ran the numbers on producing Christmas ornaments in-house with a City Holiday die versus buying comparable ornaments from a wholesaler. The die cost $18. Cardstock for each ornament—using 80 lb cover at roughly $0.15 per sheet—came to about $0.05 per piece with optimized nesting of three ornaments per sheet. Labor, packaging, and overhead added roughly $0.55. Total in-house cost: about $0.60 per ornament. Wholesale was $2.40 each.
That's a 75% saving. The die paid for itself after ten ornaments. By the time we'd produced 300, that single die had saved us $540. Don't hold me to those exact figures—paper prices fluctuate and labor rates vary—but the method is what matters. Build your own unit-cost formula in a spreadsheet and use it before any significant purchase. I built one after getting burned on hidden fees twice, and it's saved us thousands. At least, that's been my experience with production runs in the 300 to 1,000 piece range.
Step 5: Create a Die Storage and Tagging System Before You Need It
We didn't have a formal die-tracking process when we started. It cost us when we reordered 14 dies we already owned, thinking they'd been lost during a studio move. That was roughly $200 of avoidable waste—and it happened because we stored dies by brand instead of by project.
My recommendation: store dies in labeled plastic sleeves or magnetic sheets, organized by collection or project, not by brand or size. Tag each die with its product number, purchase cost, and date of acquisition. Setting this up takes about four hours if you have 60-plus dies. It will save you from reordering the same $18 die twice, and it gives you a central record of what your tooling actually costs.
We also photograph each die and attach the picture to its sleeve. When you're planning a production run, seeing the die design without opening a dozen sleeves is faster and keeps your workspace clean. Sounds like overkill until the day it saves you from a deadline crisis.
Step 6: Test-Cut Every New Die with Your Standard Papers
I skipped a test cut once because it "never mattered." That was the one time it mattered. We were producing 200 greeting cards with a new metal cutting die, and the die wasn't cutting cleanly through the 100 lb cover cardstock we use for card bases. Result: 40 ruined card blanks and about $120 in wasted materials and labor.
The fix takes 10 minutes. Run a test cut on the exact paper you'll be using in production, check the cut quality, and adjust the machine pressure or the cutting sandwich if needed. Do this every time you bring in a new die, every time you change paper suppliers, and every time you switch machines. Consistency is the whole game in production crafting.
Common Mistakes and Honest Limitations
Three more things I'd want to know if I were starting from scratch:
1. "Cheapest" can mean "costliest." When I compared an entry-level die cutting machine against the Platinum for one of our satellite teams, the entry-level model cost 40% less. But it couldn't handle the 100 lb cover stock we needed for holiday figurines, so we had to buy a second machine within six months. The total cost of ownership was higher by about $150. Use a TCO spreadsheet, not the sticker price.
2. Color consistency matters more than you expect. If you're producing branded holiday products, batch-to-batch color consistency is critical. The industry standard for color tolerance is Delta E under 2 for brand-critical colors; above 4 is visible to most people. When buying cardstock for your City Holiday collection, stick with the same supplier and check the lot number. Switching suppliers can cause subtle shifts that look fine alone but look wrong side-by-side on a shelf.
3. This checklist doesn't apply to everyone. If you're producing fewer than 100 pieces per month, a die cutting machine may not be the right investment at all. At that volume, buying pre-cut pieces or wholesale decorations may make better financial sense. I recommend these machines for about 80% of the businesses I advise. If you're in the other 20%, your unit-cost spreadsheet will tell you if you actually do the math. Trust it.
Oh, and one more thing: always verify paper weight limits for your specific machine. Dies that cut beautifully through 80 lb text paper (about 120 gsm) may not perform the same in 80 lb cover stock (about 216 gsm). When in doubt, run a test cut. That's now a permanent rule at our shop—we learned it the expensive way.