-
Step 1: Match the Paper to the Finished Product, Not the Pattern
-
Step 2: Confirm Your Die Fits the Cutting Area Before You Commit
-
Step 3: Use the Plate Stack the Manual Calls For—No Brilliant Modifications
-
Step 4: Test the Most Detailed Die in Every Batch—Even With Dies You've Run a Hundred Times
-
Step 5: Release Delicate Pieces Carefully—Then Inspect Before You Glue
-
Step 6: Keep a Production Log. Future December You Has a Bad Memory
-
Final Warnings
For the past six years, I've made Christmas ornaments and greeting cards for corporate clients in a small two-person studio. In my first two seasons, I personally made and documented nine significant mistakes. Combined, they cost roughly $3,300 in wasted cardstock, damaged dies, and weekend rework. This checklist is what survived that tuition.
I'll be upfront about the limits of my sample. This checklist comes from one production setup: a Spellbinders Platinum cutting machine with mostly Spellbinders Christmas dies, including a few from the Spellbinders Classic Mouse Christmas collection. If you're running a different machine, the logic still applies, but check your machine manual before you copy our plate routine.
And if you found this article by asking what kind of paper is used for scrapbooking, you're in the right place. That was my starting question too. The answer, though, depends on what you're making.
Step 1: Match the Paper to the Finished Product, Not the Pattern
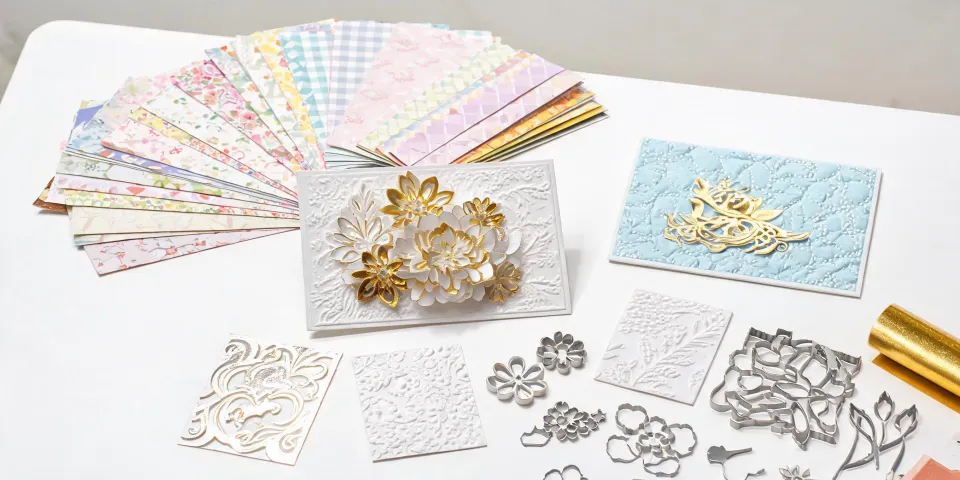
The short answer is cardstock. But "cardstock" is not one thing. For a flat scrapbook layout, ordinary 80 lb. cardstock is the workhorse—sturdy enough for pages and thin enough to cut detail without forcing the die. Most 12x12 scrapbooking paper falls in this range. For a flat greeting card, 80 lb. also works well.
Christmas ornaments are different. A hanging ornament gets handled, boxed, shipped, and stored. If it's cut from 65 lb. paper, it can look perfect on the cutting mat and arrive as a sad, crumpled thing in a padded envelope. At our shop, the rule is now: 100 lb. and up for structural ornament pieces, 80 lb. only for glued-on layers. The heavier stock costs a few dollars more per pack (based on public craft-retail prices, January 2025; verify current rates). That difference has saved us far more in rework than it costs at checkout.
This was my biggest early mistake. In early 2021, I cut a batch of ornaments from a beautifully textured 80 lb. cardstock because the pattern was perfect. The texture fought the intricate dies—some pieces tore during release, and the flat shapes were too flexible to assemble cleanly. I spent the weekend recutting and wasted roughly $210 in paper. The paper wasn't bad. It just wasn't right for dimensional ornaments.
One more thing about scrapbooking paper for die cutting: if you're tempted by glitter cardstock, resist it. Glitter sheds and clogs the fine recesses of detailed dies, and every sheet you cut after that gets a little less crisp. Cut plain cardstock and add glitter after assembly if you need sparkle.
Step 2: Confirm Your Die Fits the Cutting Area Before You Commit
Not every Spellbinders Christmas die is the same footprint. Most of my workhorse ornament dies are standard-size dies, and the Classic Mouse Christmas mice have done beautifully on our Platinum. But every holiday season tempts me with a larger-format piece that won't fit the active area of the machine's cutting plates.
I learned this in September 2022 with an elegant oversized angel die bought from a closeout table. It was gorgeous and slightly too wide for the machine. I decided I'd get clever and angle it. I didn't. Partial cuts, skipped details, wasted sheets, and a very quiet drive home.
Take the one-minute habit: check the package or the product page on spellbinders.com for the machine compatibility note. Then place the die in the center of the bottom plate, close the platform, and turn the crank once with no paper. If you hear scraping or feel resistance, solve it before you risk a sheet.
Step 3: Use the Plate Stack the Manual Calls For—No Brilliant Modifications
On a Spellbinders machine, the die and plate order matters more than people assume when they're in a hurry. Spellbinders includes a plate diagram with the machine, and the support page posts the same info. I have a copy taped to the shelf above mine. Use that order every time.
Where I lost money was trying to improve the stack. In my second year, I added makeshift shims because I was convinced the machine needed more pressure. One plastic plate came out with a permanent dimple. After that, every die that passed over that spot cut differently. That was a $70 replacement plus an entire evening of detective work.
If a die isn't cutting through, clean the die first. Tiny paper fibers collect along the cutting edges and act like a cushion. Run a soft brush across the die, test again, and only then think about pressure. If you genuinely need more pressure, add one sheet of plain cardstock as a shim. Test. Add another only if you have to. Don't reinvent the stack.
Step 4: Test the Most Detailed Die in Every Batch—Even With Dies You've Run a Hundred Times
In October 2022, we ran a large corporate order with Classic Mouse Christmas mice and a new red cardstock. The color came from a different supplier because our regular one was out of stock. We had run those dies dozens of times, so I skipped the test cut. I didn't notice the problem until we had sixty finished mice whose delicate tail details were tearing free. That was $190 of material in the recycle bin and two nights of recutting.
Here's the counterintuitive part: if the most detailed die in the set cuts cleanly, the simpler dies are almost certainly fine. So our test is never the big pretty snowflake. It's the smallest, most detailed die in the order. With the Classic Mouse Christmas collection, that means one of the detailed mice. If those fine features come through clean, the rest of the batch has a good chance.
Run this test every single time a variable changes: new paper brand, new color, new lot, new die. In January 2024, a delivery of our usual cardstock arrived with identical packaging, and the test failed. The mill had changed somewhere in the supply chain. That five-minute test kept a bad batch out of production, and it's exactly why this step is not optional for us anymore.
Step 5: Release Delicate Pieces Carefully—Then Inspect Before You Glue
A clean cut doesn't mean the piece is ready. Fine details often stay seated in the die, and how you remove them matters more than you'd think. Pulling a small shape out from the front stretches the paper and ruins the crisp edge. Instead, turn the die over and push the piece out from the back with a detail pick tool. That one habit eliminated most of our torn whiskers, tiny tails, and broken branches.
Once the pieces are out, inspect them under good light before you glue anything. An incomplete cut is easy to miss on a flat sheet and impossible to ignore once the ornament is assembled. If the same spot fails repeatedly, check whether the problem is the die or a worn area on your cutting plate. Rotate the die 180 degrees and test again. If the problem follows the die, the die needs attention. If it stays in the same spot, it's the plate.
Step 6: Keep a Production Log. Future December You Has a Bad Memory
After year three, I started logging every production run. Each entry takes under two minutes: date, die set, paper brand, color, weight, plate condition, and the test-cut result. It sounds like overkill until the first time you need to reproduce a result from eleven months earlier.
The log caught 47 potential production issues for us between 2023 and the end of 2024. Some were small—a paper lot that had changed, a plate that should have been retired. A few were large enough to have ruined an entire seasonal order. If you want the cheapest insurance available to a crafter, this is it. A notebook and a two-minute habit.
Final Warnings
Keep your dies clean while you cut, especially during long Christmas runs. Fibers build up fast, and a dirty die cuts like a tired one. Use a soft brush every twenty-five to fifty cuts if you're doing production volume.
Let cold paper acclimate before you cut it. A delivery sitting on a loading dock in December arrives stiff and a little damp. If you cut it immediately, you'll chase pressure problems that disappear the next day. Give it a few hours in your workroom first.
And don't push a die through material it wasn't designed for. If you're experimenting with felt, cork, or metal sheets, use the right tool for that job.
Five minutes of checking beats five days of rework. I know because I've paid for both.