-
1. Define your materials before you look at any machine
-
2. Check the machine's pressure range and clearance
-
3. Run a real test with your exact materials
-
4. Verify die compatibility and availability
-
5. Look at the ecosystem, not just the machine
-
6. Check the cutting system's running costs
-
7. Calculate total cost of ownership, not just the sticker price
-
What most people get wrong
-
Bottom line
I review craft products for a living. Somewhere around 200 unique items a year—machines, dies, finished goods, you name it. Everything has to pass my approval before it reaches customers. When a new die cutting machine lands on my desk, most people expect me to start with the spec sheet. I don't. I start with the material.
Because the question I get asked more than any other—"What is the best cutting machine for fabric?"—can't be answered from a spec sheet alone. Fabric is fussy. It shifts, it stretches, it frays. A machine that cuts paper beautifully can mangle felt. And I've watched procurement teams learn that the hard way, after the purchase order was signed.
This checklist is for anyone evaluating die cutting machines for a business: gift companies, paper goods manufacturers, craft retailers. If you're sourcing a machine for fabric, greeting cards, or holiday figurines, these are the seven points I check before I approve anything.
1. Define your materials before you look at any machine
This seems obvious. It's also the most skipped step. I've watched procurement teams do this for years: pick a budget, pick a brand, then wonder why the machine underperforms. Wrong order.
Fabric is the case that exposes this. The old thinking was that you need a dedicated fabric cutting machine with an oscillating blade. That came from an era when die cutting machines were essentially paper presses with limited pressure. Today, the pressure systems in modern die cutting machines have largely closed that gap. But you still need to know what you're cutting: lightweight cotton, felt, leather, denim? Multi-layer stacks? Each changes the requirements.
Sit down and write out your top three materials. If you plan to produce greeting cards and holiday figurines on the same machine, list those too. Keep that list with you through every step below.
2. Check the machine's pressure range and clearance
This is where spec sheets earn their keep. For fabric, you need three things: adjustable pressure (not just on/off), enough clearance for thick stacks, and a cutting platform that distributes pressure evenly.
The Spellbinders Platinum die cutting machine is a good reference for what to look for—it has adjustable pressure settings and a wide platform that handles multiple dies in one pass. In Q1 2024, when we audited cutting consistency across the machines we work with, the Platinum held a flat, even cut across a full sheet. That consistency matters more than wattage or brand name.
The clearance spec is the one people miss. When you cut fabric with a die, you're running cutting pad + fabric + die + another cutting pad through the machine. That stack adds up. I've seen operators try to force a stack that was 2mm too thick. The result: half-cut fabric and an angry phone call to the vendor. Check the maximum material thickness, then subtract 1mm for the pads. That's your real clearance.
3. Run a real test with your exact materials
The numbers said the budget machine was fine. Same pressure spec, similar platform size, 30% cheaper. My gut said test it first. So we did.
Here's the thing: any machine can cut one piece of paper. The test is consistency over a run. My protocol for a machine evaluation looks like this:
- Cut 50 identical shapes in your primary material.
- Measure every 10th piece for dimensional accuracy.
- Cut a multi-layer stack to simulate figurine production.
- Run a mixed batch of fabric and paper without changing settings.
The budget machine failed step two. The pieces drifted up to 1.5mm from the die registration, which meant our greeting card inserts wouldn't line up. The cost difference for the machine that passed? Around $200 per unit. On a 500-unit run, that pays for itself in the first week of production.
4. Verify die compatibility and availability
This is the long game. A machine is only as good as the dies you can actually get for it. For B2B production, you need a deep die library that's in stock, not a spec sheet that's somewhere in the mail.
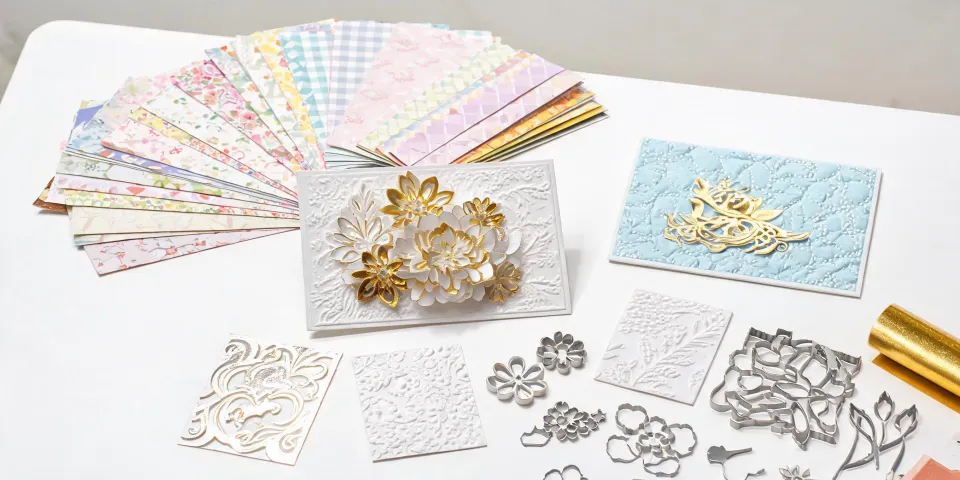
Take the Spellbinders Classic Mouse Christmas collection as an example of what a healthy die ecosystem looks like. The dies work for greeting cards, gift tags, and holiday figurines from the same platform. That cross-application matters when you're building product lines, because one machine investment can cover multiple SKUs. When you evaluate machines, count how many dies you'd genuinely use in your product range. That's what I mean by due diligence.
Third-party dies complicate things. They're fine—or rather, they can be fine—but you own the risk. I've seen dies that fit the machine but sit slightly unevenly on the platform, giving a clean cut on one side and a shallow cut on the other. If you standardize on a machine, standardize its dies too, at least for critical product lines.
5. Look at the ecosystem, not just the machine
Any die cutting machine is a platform. The real question is what runs on it, because that's what determines your production possibilities.
Things I evaluate on the ecosystem side:
- Die depth—how large is the catalog, and is it actually stocked?
- Kits—are there complete kits so you can test products quickly?
- Seasonal lines—are there coordinated holiday collections for retail refreshes?
- Fabric-specific dies—not all dies are designed for fabric; look for finer cutting edges if fabric is your main material.
And real talk: don't buy a machine because you love one die set. Buy it because the system can produce the range of products your customers actually order. I made this mistake once. One of my biggest regrets in this role was choosing a machine based on a single beautiful collection, only to find the other dies I needed were perpetually backordered. We had to rework the entire production plan. That cost more than the machine.
6. Check the cutting system's running costs
The cutting plates and platform are consumables. They wear out. And their cost adds up over a year of production. Most buyers factor in the machine and the dies. Few factor in cutting plates, and even fewer check how long a plate actually lasts.
In our 2024 review, we tested cutting plate durability across three machines. The best set lasted roughly nine months of continuous production. The worst started wearing unevenly after about fourteen weeks. That's a real cost line, not a footnote.
Check plate pricing and availability before you commit. And if you're cutting fabric, you'll want a stiffer base plate for consistent support. Some systems force you to buy a proprietary bundle when only one pad wears out. That's a hidden cost you won't see until month four.
7. Calculate total cost of ownership, not just the sticker price
Now do the math. Not just the machine price. Include the dies for your first three products, two replacement plate sets per year, and the labor time for your team to learn the system. The learning curve is real, and it's billed at your labor rate.
Then compare that 12-month total to outsourcing. For context: a run of 500 custom greeting cards from budget-tier online printers runs roughly $80–150 (based on publicly listed prices, January 2025; verify current rates). If you'd otherwise outsource die-cut pieces to a finisher, setup fees typically add $50–200 per design, depending on complexity.
If your order volumes are steady, in-house die cutting starts to make sense. This is the risk-weighing moment. The upside is speed and control over your production schedule. The risk is committing to a system that underdelivers. I kept asking myself during our evaluation whether control over production was worth potentially investing in a system that could disappoint. The answer was yes—but only because we had tested thoroughly before signing anything.
What most people get wrong
Three mistakes I see again and again in machine procurement:
1. Buying on specs alone. Specs tell you the range; they don't tell you the consistency. The same machine can produce excellent cuts on paper and poor cuts on fabric, because fabric moves. You need a machine that holds the work down and cuts evenly at speed. That's why the test in step 3 is non-negotiable.
2. Treating fabric like paper. People buy a "fabric-capable" machine and then wonder why felt comes out with ragged edges. Use the right cutting plate combination, and don't stack too high. I still kick myself for not documenting this early on in our own production.
3. Skipping the die inventory check. The best machine in the world doesn't help if the dies you need are backordered for six weeks. Check the die catalog before you check anything else.
Bottom line
So—what is the best cutting machine for fabric? The one that passes this checklist. In my experience, that's usually a machine with adjustable pressure, a wide platform, and a deep die ecosystem. If you want a concrete starting point, the Spellbinders Platinum series is worth a look. Not because it's the most popular, but because it's consistent. And in my line of work, consistency is the only metric that survives contact with production.
There's something satisfying about watching a stack of fifty matching greeting cards come off a machine, all within tolerance. That's the payoff after the evaluation grind. Run the checklist. Test the machine. Measure the output. Done.