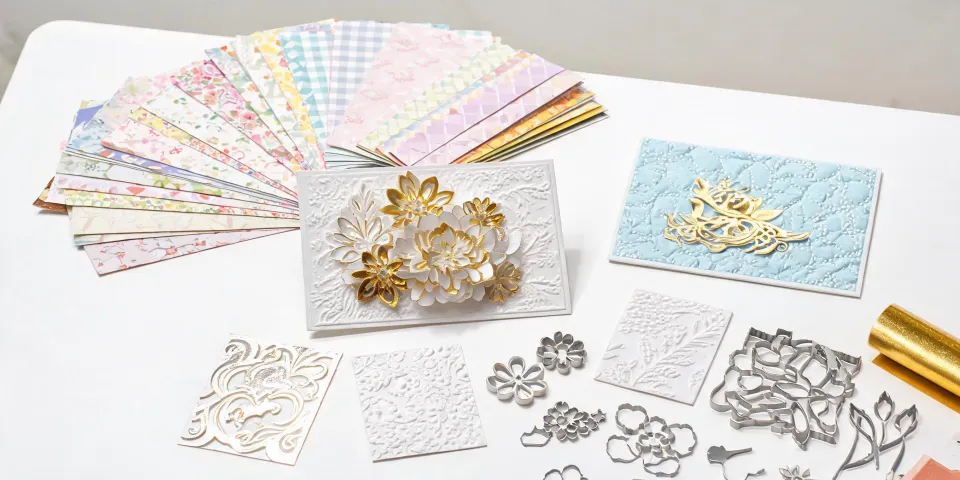
Let me be honest: I’ve ruined a lot of paper over the years.
Back when I first started sourcing holiday packaging for corporate clients, I thought the biggest challenge was just finding the right die. Grab a snowflake shape, slap it on some cardstock, done. Right? Wrong. The problem wasn’t the die. It was everything else.
This article isn’t about which die cuts the prettiest snowflake. It’s about why so many Christmas craft projects still end up looking exactly like the stack of cards your client’s assistant could have bought at a big-box store for $3.99. And how—after enough late-night re-dos—I landed on a different approach.
The Surface Problem: It Looks ‘Crafty’ in a Bad Way
You know the look. The card has a beautiful die-cut reindeer in the center, but the paper is too thin. Or the layers don’t quite line up. Or the sentiment inside is printed on plain computer paper, folded awkwardly because the card size didn’t match the envelope.
I’ve seen this a hundred times. A business spends hours (or pays someone) to handcraft 200 holiday cards, and the result feels… cheap. Worse, it feels generic. That personal touch you were going for? It disappeared behind a flimsy impression.
Here’s the thing: that’s not a creativity problem. It’s a system problem.
The Deeper Layer: Three Hidden Traps in Holiday Crafting
Most people think the issue is skill. It’s not. The real traps are much more boring—and that’s exactly why no one talks about them.
Trap 1: The Machine vs. The Material Mismatch
Not all die cutting machines are the same. I learned this the hard way four years ago when a client wanted 300 custom Christmas ornaments with a velvet finish. My standard machine—a perfectly fine model—completely mangled the material after three passes. The velvet nap caught the blade, the edges frayed, and I had to restart with a new roll of material. Net loss: about $150 in wasted stock and six hours of reset time.
What I needed was more consistent pressure. That’s when I finally tested a Platinum Scout. It handled the dense velvet base without a single jam. Not because the machine is fancy, but because its pressure system is designed for thicker stacks. I wish I had tested that difference back when I was ordering demo units.
If I remember correctly, the Scout’s manual mentions a ‘sandwich’ for thicker materials. I skipped that step. Don’t skip it.
Trap 2: The ‘One Die Fits All’ Fantasy
A single die is great for a single project. But the moment you need variation—say, a mix of holiday figurines, Christmas ornaments, and layered card fronts—a single die becomes a bottleneck. You’ll end up cutting the same shape over and over, and the final batch will feel repetitive.
That’s where the ecosystem matters. Spellbinders’ product line isn’t just a set of standalone dies; it’s designed with stacking geometry in mind. The Classic Mouse Christmas collection, for example, uses precise interlocking layers. Each piece is meant to be paired with another. The result is a 3D effect that actually looks architected, not pieced together.
Put another way: using a single die for a multi-layer card is like using only a hammer when you need a screwdriver. Possible, but painful.
Trap 3: The ‘Print Then Glue’ Fallacy
A client once asked me: “Can’t I just design the greeting on my computer, print it on nice paper, and then glue it onto the card base?” That approach works—until it doesn’t. The printed layer often shifts during gluing. Alignment drifts by a millimeter, and suddenly the whole composition looks off-center.
I’ve seen this ruin hundreds of dollars worth of materials. The correct workflow is to print and then die-cut the printed panel to the exact card base size. That way, the design is always centered. It sounds obvious, but I see professionals skip this step all the time.
The Cost of Getting It Wrong
This isn’t abstract. Bad holiday packaging costs real money.
Last quarter alone, I tracked three separate clients who ordered custom greeting cards and ended up reprinting because the initial batch looked unprofessional. One company spent $2,200 on a rush reorder after their handmade first batch arrived with glue marks visible on the fold. They saved $300 by going with a ‘cheaper’ initial production method. The redo, plus the rush fees, meant their total cost was almost double the price of a proper die-cut run from the start.
Beyond the direct cash, there’s the impression. A holiday card is often the last piece of physical communication a client receives from you all year. If it feels like an afterthought, that’s the taste they take into January.
“I still feel the sting of that first failed batch. The client didn’t complain. They just didn’t reorder the following year.”
The Smarter Approach: Why the System Matters More Than the Single Tool
After enough trial and error, I stopped treating craft supplies as isolated purchases. Instead, I started thinking about the production chain.
- Input: Design and print on a consistent, thick cardstock. Standard letter-size sheets—like 110 lb cover stock—work beautifully.
- Cut: Use a reliable machine (coincidentally, the Platinum Scout has been my workhorse for two years) with dies that interlock. The Spellbinders Classic Mouse Christmas set, for example, saves me layout time because the layers are designed to nest. I don’t have to guess alignment.
- Assemble: Use a bone folder for crisp creases. Attach the printed-and-cut panel to the base card deck.
That’s it. The magic isn’t in a single expensive die. It’s in a repeatable process that eliminates the three traps above.
And if you’re wondering how to make greeting cards on a computer that actually work with a die-cut system: use standard US letter or A4 templates, keep a 1/4 inch bleed around the edge, and center your sentiment so it aligns with the die’s cut line. Most die sets include a measurement guide. Use it.
I don’t have hard data on how many crafters skip these steps. My sense, based on the dozens of reprint requests I’ve handled, is that it’s the majority. That’s not a criticism. It’s just a signal that the industry’s default workflow has a gap. The solution isn’t a better die. It’s a better chain from start to finish.
A Final Note on the Craft Industry’s Evolution
What was considered ‘good enough’ in holiday handcrafts five years ago doesn’t cut it now. Businesses expect refinement. Your clients compare your card not just to other handmade cards, but to the polished packaging they receive from luxury retailers.
The fundamentals of good papercraft haven’t changed: clean cuts, consistent alignment, proper material choice. But the tools for achieving those fundamentals have transformed. A modern die cutting system—paired with a smart die set—closes the gap between ‘handmade’ and ‘professional’ faster than it used to.
“The total cost of owning a good system isn’t the machine price. It’s the cost of the reprints you don’t have to run.”
If you’re still wrestling with frayed edges, misaligned layers, or card bases that feel hollow, stop blaming your hands. Blame the system. And then fix it.