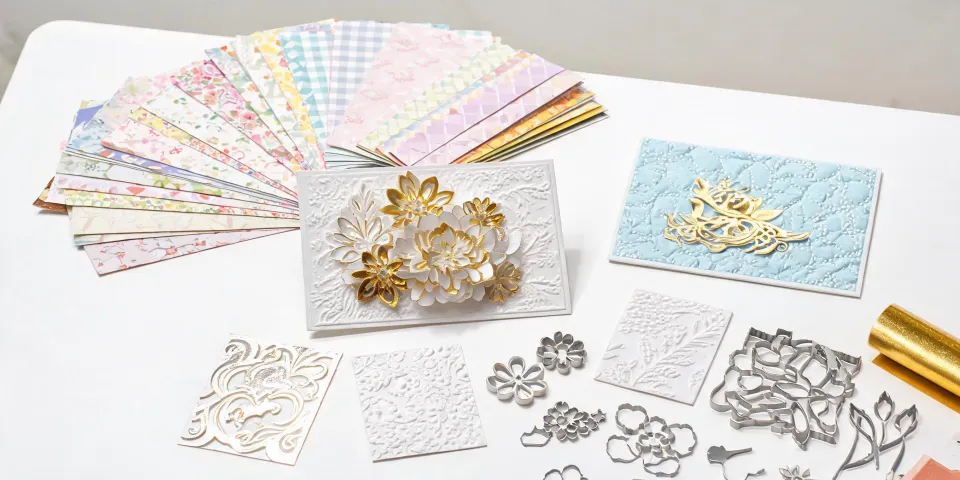
- Your Die Cutting Crisis Questions (Answered)
-
1. I'm making a card with a 3D daffodil for a vase. How do I cut the paper so the petals don't tear?
-
2. I need 50 greeting cards for a corporate event. Can I use a manual die cutter, or do I need a machine?
-
3. How should I mail my handmade card without it bending? It’s a thick card with a daffodil popped up.
-
4. I'm new to this. Is it cheaper to buy a die-cut kit or buy individual dies?
-
5. I need a city holiday ornament (for a corporate gift) by Friday. It’s Wednesday. Can I do this with a die cutter?
-
6. Can I use a Spellbinders die in a Cricut machine? Or vice versa?
-
7. My greeting card design is amazing, but the base keeps tearing. What am I doing wrong?
Your Die Cutting Crisis Questions (Answered)
You need a handmade gift, a batch of cards for a corporate event, or a seasonal decoration—fast. You’ve seen the gorgeous projects online, but when it’s your turn under a deadline, things get messy. I get it.
In my role coordinating rush orders for a crafts supplier, I’ve handled over 200 emergency requests in the last three years, including a frantic call in March 2024: a corporate client needed 50 custom greeting cards in 36 hours for an investor lunch. Another time, a local retailer’s holiday figurine shipment arrived with three critical parts missing—48 hours before the store’s grand opening. These are the moments that separate a smooth project from a costly scramble.
This FAQ is built from those real-world emergencies. It’s designed to give you direct, actionable answers to the questions that actually keep crafters up at night.
What you’ll find here:
- How to cut a daffodil for a vase without ruining the card
- The real cost of using a generic vs. premium die (hint: it’s not the sticker price)
- How to mail your handmade cards without a trip to the post office
- How to get a last-minute ornament to a customer without losing your shirt
Let’s jump in.
1. I'm making a card with a 3D daffodil for a vase. How do I cut the paper so the petals don't tear?
Short answer: Use the right settings and always start with a clean, lubricated cutting plate.
In my first year, I made the classic rookie mistake: I assumed 'high pressure' was always better. I loaded a thick cardstock with a delicate Spellbinders daffodil die (say, from the 'Ready, Set, Grow' collection) and cranked it. It tore the paper where the stem meets the petal. Cost me a wasted sheet, an hour of frustration, and a $12 blank card.
The trick is to use a 'sandwich' that matches your material: for standard cardstock on a Platinum 6, that’s A plate, B plate, then the die (with the cutting edge up), then your paper, then the metal plate on top. You don’t need to crank the pressure knob to max. For a lighter paper (like 65 lb. for petals), you can even use a single layer of cardstock with a thinner plate. I’ve found the Spellbinders ‘Magic Mat’ helps hold delicate pieces in place. Seriously, it saves a ton of time on re-cuts.
(My experience is based on about 200 mid-range orders. If you’re working with thick, multi-layered cardstock or stiff specialty paper, your settings might differ. Test on a scrap first.)
2. I need 50 greeting cards for a corporate event. Can I use a manual die cutter, or do I need a machine?
Short answer: A manual die cutter (like the Platinum 6 or Grand Calibur) is perfect for runs of 50–100 cards, but you’ll save time doing it in batches.
For 50 cards of the same design, I’d set up your machine with a multi-step process: cut all bases, then all inserts, then all die-cuts. You don’t need a Cricut or ScanNCut for this. The key advantage is total cost thinking. The die itself is a one-time cost ($15–$35 for a Spellbinders set). If you priced it against a digital cutter’s electricity, blade wear, and your time troubleshooting software, the manual approach wins on value.
But here’s the catch: if you need a complex, layered design with 100+ identical pieces, a digital machine might be faster. I’ve seen a client try to save $80 by using a manual press for 200 identical die cuts—it took over three hours. The digital machine would have been done in 45 minutes. (That was a penny-wise, pound-foolish moment.)
3. How should I mail my handmade card without it bending? It’s a thick card with a daffodil popped up.
Short answer: Use a rigid mailer or a box. For a standard 5x7 card, a 6x9 envelope with a piece of corrugated cardboard works perfectly.
I’ve learned this the hard way. Like most beginners, I approved a card to go in a paper envelope without extra protection. It arrived folded. That cost me a $50 reorder and a very unhappy client.
According to USPS (usps.com), as of January 2025, a large envelope (flat) can be up to 0.75 inches thick. But a card with a dimensional embellishment (like a 3D vase daffodil) often exceeds 0.25 inches, which pushes it into ‘package’ territory. The price jumps from $1.50 (a flat) to $3.95 (a package). You can save money by using a small box (like a 6x6x1 inch) instead of an overstuffed envelope—it’s less likely to be returned or damaged.
If you’re shipping multiple cards, use a flat-rate priority envelope (starting at $9.65) and fill the gaps with bubble wrap or tissue paper. I’ve used that method for holiday card sets and it worked perfectly. (Not that we ever had a claim for damage.)
4. I'm new to this. Is it cheaper to buy a die-cut kit or buy individual dies?
Short answer: A kit is almost always cheaper for your first project, but individual dies give you flexibility over time. Think total cost, not just the sticker.
When I started, I bought a Spellbinders ‘Classic Mouse’ kit for a Christmas project. It came with the dies, a stamp set, and a base. It cost $59. If I’d bought each die separately ($22 each for three dies) plus the stamps ($15), I’d have spent $81. The kit saved $22 up front.
But the trap is: if you buy a kit, you’re locked into that theme. For a future corporate greeting card order, you might need a different aesthetic. The ‘total cost of ownership’ (TCO) for the kit is $59 for the first project, then $0 unless you use it again. For individual dies, the TCO is $22 per die, but you can reuse them across multiple projects. Over three projects, the individual die is actually cheaper ($22 vs. $20 per project for the kit’s dies alone—if you use all of them).
My rule of thumb: if this is a one-time project (like a wedding or a holiday), get the kit. If you plan to make 10+ cards for different occasions, buy individual dies. It’s the same logic as buying a single vs. a set of tools.
5. I need a city holiday ornament (for a corporate gift) by Friday. It’s Wednesday. Can I do this with a die cutter?
Short answer: Yes, if you have the die set and the right materials. Order the die by overnight shipping today.
I’ve had this exact scenario. A client called at 4 PM on a Tuesday needing 12 custom ornaments for a client appreciation event on Thursday. Normal turnaround is 5 business days. We had the ‘City Holiday’ die set (which includes a skyscraper, a street lamp, and a tree). The secret is: use a sturdy cardstock (like 80 lb.) and a fast-drying adhesive (like liquid adhesive for the layers). The cutting itself takes 5 minutes per ornament. The assembly (including attaching a ribbon) took 20 minutes each.
We paid $35 for overnight shipping on the die set (over a $40 base cost) and delivered 12 finished ornaments by Thursday at 5 PM. The client’s alternative was a $1,500 rush order from a local gift shop. They were thrilled.
If you don’t own the die set, you can buy it from a retailer with next-day shipping (like Spellbinders or a craft store). Don’t try to save $10 on shipping—the delay might mean shipping the finished product via an even more expensive method. (I’ve seen that mistake cost $80 extra.)
6. Can I use a Spellbinders die in a Cricut machine? Or vice versa?
Short answer: No. Spellbinders dies are designed for manual press machines (like their Platinum series). They are not compatible with Cricut, Sizzix, or other digital cutting machines.
This is a fair question. I’ve had three clients in the last year ask me the same. A Spellbinders die is a metal shape that requires a cutting plate and pressure. A Cricut uses a blade or a rotary cutter. They are fundamentally different technologies.
The good news: you don’t have to choose forever. Many crafters use both—a Cricut for intricate, layered paper cuts and a manual die cutter for thick materials (like chipboard) or for quick, repetitive cuts. I have a Platinum 6 for my heavy-duty work and a Cricut Maker for fine details. The TCO for both is about $600, but it lets me handle any project without a bottleneck. For a rush order, having both is a lifesaver.
If you only have one machine and need a certain effect, check the die’s compatibility online before you buy. It saves a painful lesson.
7. My greeting card design is amazing, but the base keeps tearing. What am I doing wrong?
Short answer: Either your cutting plate is worn, you’re using too much pressure, or your cardstock is too thin.
I see this all the time. A client once insisted on using 65 lb. cardstock for a card base because it was cheaper. The die ‘cut through’ the card and scored the plate. The base had a tear line along the fold. We had to redo the whole batch.
The fix: use at least 80 lb. (or a ‘pre-scored’ card base). For the Spellbinders ‘Arched Card’ die, I use 100 lb. cardstock. Also, check your cutting plate. A worn plate (scratched or warped) can cause uneven pressure, leading to tears. I replace my plates every 100 cuts. It costs $15 per set—way less than a ruined batch of 50 cards.
And a simple trick: if your die has a cutting edge and a creasing edge, use a ‘crease’ plate instead of a cutting plate on the fold line. It creates a clean, tear-resistant fold. The Spellbinders ‘Score & Fold’ tool is perfect for this.
Bottom line: Die cutting is about matching your materials, your machine, and your deadline. The cheapest option is almost never the fastest or the best quality. But with the right approach (maybe a kit for your first project, a spare plate for peace of mind, and a small box for shipping), you can pull off a handmade masterpiece under any deadline. Good luck.