-
How Do You Make a Personalized Gift Card? Here Is the Process
- Why the Spellbinders Platinum 6 Die Cutting Machine Earned Its Place in Our Supply Closet
- The Production Process We Use
- What Went Wrong: Three Mistakes We Made
-
What I Would Do Differently
-
Boundary Conditions: When This Setup Does Not Work
-
Final Verdict from a Purchasing Perspective
If you are trying to make personalized gift cards for a company without turning December into a DIY nightmare, the answer is straightforward: use a Spellbinders Platinum 6 die cutting machine, a few Spellbinders Craft Stax sets, and professionally printed card bases. That sounds like a lot, but it is actually the opposite. It is less work than hand-decorating each card, and the result is better than a generic store-bought one.
I manage purchasing for a 160-person company across three locations. I spend roughly $85,000 a year across 14 vendors, mostly office supplies and branded merchandise. I report to operations and finance, so a die cutting machine in the budget drew some questions. In 2024, during a vendor consolidation project, I had to justify why the machine belongs in our supply closet. My answer was simple: it replaces several hundred dollars of custom-branded ornaments, and the gifts feel less generic.
This is not a product review. It is a process guide. The process starts with an answer: personalized gift cards work best when you combine a professionally printed base with die-cut layers that you produce in-house.
How Do You Make a Personalized Gift Card? Here Is the Process
You do not need to design every card from scratch. That is where most people waste time. Instead:
- Order blank card bases with your company logo or a simple greeting printed on them.
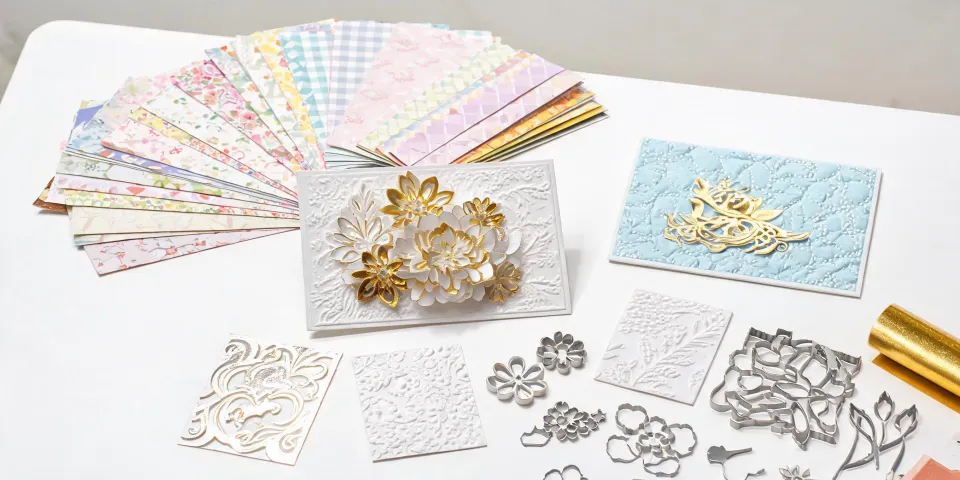
- Use the Platinum 6 to cut coordinating shapes, names, and small layered decorations.
- Assemble with adhesive dots.
- Add a handwritten or printed inside message.
That is the whole system. The 'personalized' part is a die-cut name or a snowflake that matches the recipient's department color. It does not need to be elaborate.
Why the Spellbinders Platinum 6 Die Cutting Machine Earned Its Place in Our Supply Closet
I tested our first Platinum 6 in 2022 after a colleague who runs a small paper business let me borrow hers. I was somewhat skeptical. The numbers said buy a cheaper machine. My gut said this one felt sturdier. The machine is still running today; the cheaper one we had originally budgeted for had a plastic gear issue within six months. In my experience, the Platinum 6 handles repeated runs better than anything else at its price point. We cut 800 to 1,000 dies each December: snowflakes, trees, small tags, and a few holiday figurines. We also use it for birthday cards and onboarding kits during the rest of the year. It is not a toy. It is equipment.
What Craft Stax Adds
The Spellbinders Craft Stax line felt gimmicky to me at first. They are stacking dies rather than single flat dies. You cut two or three matching pieces and glue them together to get dimension. For a holiday figurine, that makes a real difference. The snowman on our reception desk is made from four layers of die-cut cardstock, and visitors assume it is a store-bought figurine.
From a procurement standpoint, Craft Stax sets are also easier to inventory because the layers are bundled together. The instructions include a color layering guide, so a new temp can assemble them without asking me for help.
The Production Process We Use
Here is our exact workflow for 400 personalized gift cards. This is what works after experimenting for three years.
Step 1: Order the base from a reliable printer
We use an online printer for the card bases. I have had good luck with 48 Hour Print for standard A2 cards because their turnaround estimate is honest. I do not need the fastest option; I need deadline certainty. The value of guaranteed turnaround is not the speed, it is the certainty.
We upload a 300 DPI design, match the logo to our Pantone reference, and order 100 lb cover stock, which is about 270 gsm. That weight is heavy enough to survive a die cut without tearing. This is where I made my biggest mistake in year one.
Step 2: Create a cutting schedule
Before cutting, I make a list of every die we will use and how many cuts each die needs per pass. The Platinum 6 can cut multiple dies in one pass if they fit on the platform, but not all dies should share a pass. A thin snowflake is not the same thickness as a tree. Sorting them into 'can share a pass' and 'needs its own pass' saves time and prevents bent dies.
This is also where prevention beats correction. Five minutes of verification beats five days of correction.
Step 3: Cut the layers
We cut the main color, the shadow layer, and the accent layer. For a Christmas ornament, we cut two identical shapes, glue a loop of ribbon between them, and write the year on the back. For a holiday figurine, we cut all the layers in the Craft Stax set and stack them. Once the Platinum 6 pressure is set, one person can operate it while another sorts pieces.
Step 4: Assemble and verify
Assembly is the most boring part, so we make it a team event. We put each card in a stack with its matching die-cut pieces, then one person glues, one person attaches the ornament, and one person checks the work. The checking step is not optional. I learned that the hard way.
What Went Wrong: Three Mistakes We Made
The Thin Paper Mistake
Year one, I saved $120 on lighter cardstock. It felt thick enough in the hand. Then we ran it through the Platinum 6, and the dies tore the edges on about 150 cards. The reprint cost us more than the upgrade to 270 gsm. The 'budget' choice looked smart until the waste came through. Net loss: about $380.
The Assumption Mistake
I assumed that '100 lb cover' from one supplier would be the same as another supplier's 100 lb cover. Not true. One brand was more fibrous and needed a higher pressure setting. We did not test before printing all 400. We lost an afternoon adjusting the machine. Now every new lot of paper gets a one-card test before we run the whole batch.
The Name Spelling Mistake
The first time we personalized cards with names, I copied all the names from an HR list. I did not verify the spelling with the employees. Two people had shortened names on file, and they were not happy. After that, I added a 'check your own name' step to the order form. It added ten minutes of admin work and prevented a lot of hurt feelings.
What I Would Do Differently
If I were setting this up from scratch, I would buy the Spellbinders Craft Stax sets earlier. I originally bought individual dies because the spreadsheet said they were cheaper per die. It was correct on paper, but the Craft Stax sets include matching layering guides and make assembly faster for non-crafters. The data did not capture the time savings. My gut had been saying that for a while, and I ignored it.
I would also standardize on one card size from the start. We have a drawer full of odd-sized card bases from a 'curated' assortment that sounded like a good idea at the time. Not ideal, but workable.
Boundary Conditions: When This Setup Does Not Work
This is not the right approach for every situation. If you need only 10 cards, you do not need a die cutting machine. If you need custom die-cut shapes that are not available as dies, a local print shop with a wafer die machine will be more efficient. If you need a fully formed 3D figurine made of plastic or resin, this is not that. For quantities under 25, we buy simple gift cards from a local store or use an online printing service for everything. For hand-finishing details like foil stamping or letterpress, use a specialist.
To be fair, the machine has limits. The Platinum 6 can handle most dies in its size range, but it will not cut metal or acrylic. We learned that when someone ordered a batch of acrylic keychains and assumed the machine would cut them. It did not. Granted, this setup requires more upfront work than buying a box of generic gift cards. That upfront work is where the quality comes from.
So glad I double-checked the die compatibility before we ordered a bulk lot from an auction site. We were one click away from buying a set that would not work with the Platinum 6. Dodged a bullet.
Final Verdict from a Purchasing Perspective
If your goal is a genuinely personalized gift card that feels crafted but does not eat your whole December, the Spellbinders Platinum 6 die cutting machine combined with Craft Stax dies is a strong combination. Build a checklist, test your materials, and verify names before you cut. The machine is just the tool. The system is what saves you.
My final answer to 'how do you make a personalized gift card?' is simple: start with a good base, cut layers that have meaning, and check every detail before you scale up. That is it. Done.