-
Who this checklist is for
-
Step 1: Lock down the deliverable before you cut anything
-
Step 2: Verify your dies, machine, and plates
-
Step 3: Build the timeline backwards
-
Step 4: Make a physical prototype with exact materials
-
Step 5: Cut in batches and inspect after every batch
-
Step 6: Plan the assembly line for cards and ornaments
-
Step 7: Pack with spares and a backup shipping plan
-
Last mistakes to avoid
I'm a production coordinator at a small craft company that makes corporate holiday gifts. In the last five years I've handled around 200 rush orders—maybe 180, maybe 220, I'd have to check the spreadsheet. I've seen the same three mistakes every December: someone waited too long, someone approved the wrong paper, and someone tried to assemble 500 ornaments without a checklist. This is the exact checklist I use when a client calls a week before Christmas. It works for a batch of 30 greeting cards or 1,500 ornament kits.
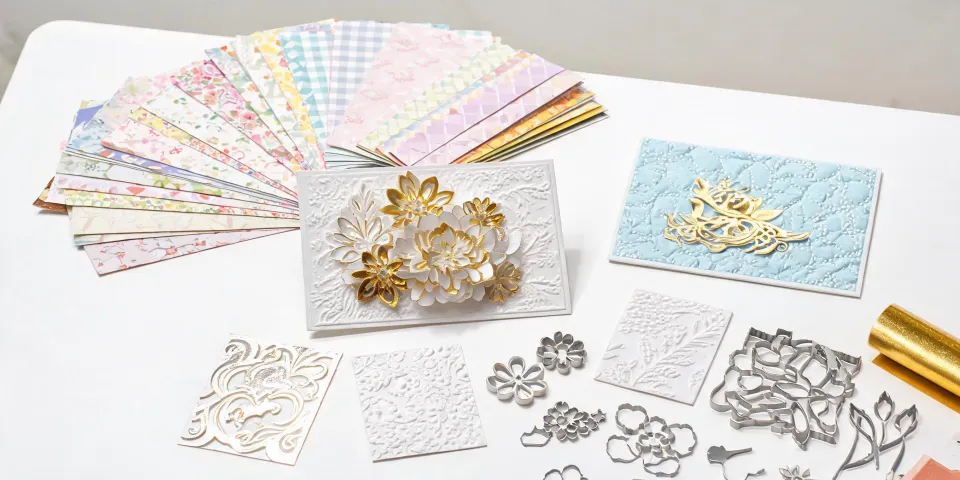
First, a quick definition: what is a corporate gift card? In the B2B world, it's not a prepaid debit card. It's a branded greeting card, often paired with a Christmas ornament, that a company sends to clients or employees. We make the card and ornament using Spellbinders Christmas dies, and the client usually tucks a gift card or check inside. The 'card' is the carrier.
Who this checklist is for
This is for anyone who needs to produce corporate holiday gifts with Spellbinders dies, especially if the deadline is already tight. If you're a small-business owner, an admin buyer, or a production person who got handed a Friday-afternoon request, these seven steps are your order of operations.
Step 1: Lock down the deliverable before you cut anything
Agree on exactly what you're making. Is it a flat greeting card? A card plus a Christmas ornament? A Spellbinders Classic Mouse Christmas die-cut front with a printed corporate greeting inside? Write it down in production terms: A2 card, 4.25 x 5.5 inches, base 80 lb cover, Spellbinders Classic Mouse Christmas front, inside printed at 300 DPI with the client's logo.
Don't say 'festive' in a spec. Say 'red 80 lb cover, 4.25 x 5.5, A2 envelope.' That's the difference between a clean rush order and a disaster.
I'll say the small-client thing once here: I don't care if your first order is 100 cards for $250. We had a client start with a $200 trial run five years ago; last year they ordered $18,000 worth of ornament sets. The vendors who treated our small orders seriously back then are the ones we still use for the big ones. Small doesn't mean unimportant—it means potential.
Step 2: Verify your dies, machine, and plates
We use a Spellbinders Platinum 6 for most production. It handles both the large Grand Calibur dies and the smaller holiday sets. The Spellbinders Classic Mouse Christmas set is our most requested collection, and it has a lot of small pieces—the tail, the ear, the holly leaf. If the cutting plates are scored or the magnetic platform has shifted, you'll get half-cut pieces. Those aren't fixable at assembly.
Checklist before you start:
- Every die piece is present, no bent blades or stuck paper.
- Correct cutting plates for the machine and die.
- Clean magnetic platform, no debris in the creases.
- Enough approved cardstock for the order plus 10% spares.
In my first year, I made the classic newbie error: assumed 'standard cardstock' meant the same thing to every supplier. The paper the client approved was 110 lb with a textured coating, not the 80 lb I tested. The first batch of 100 cards didn't cut cleanly. That mistake cost us $600 in replacement stock and a very unhappy client. Now the exact paper gets tested first, every time.
Step 3: Build the timeline backwards
Take the client's deadline and work backwards. If 500 greeting cards are due December 20, our internal schedule looks like this: December 18 ship, December 17 assembly, December 15 cutting, December 13 prototype, December 12 material order. That's a 7-day buffer. It sounds excessive, but ink and adhesive need curing time, not just my opinion.
The surprise wasn't the cutting time. It was how much of the total lead time was eaten by drying and packing. Put another way: the die cutting machine is not the bottleneck. Your drying rack is.
If you're outsourcing printed envelopes or inserts, get the printer's real turnaround in writing. Based on public online printer pricing I checked in January 2025, next-business-day printing costs 50 to 100 percent more than standard 5-to-7-day production. For a small run that may be $120 instead of $70. For a large corporate order, it can wipe out your margin. Quote it into the job, or have the conversation early.
Step 4: Make a physical prototype with exact materials
This is the step most people skip, and it's the one that saves you. Cut one card using the exact Spellbinders Christmas dies, the exact paper, the exact plates, and the exact ribbon. Print the inside message on the same printer or press you'll use for the real run. If the client has a brand color, compare it to a Pantone reference. Industry standard color tolerance is Delta E under 2 for brand-critical colors. Delta E of 2 to 4 is noticeable to trained observers; above 4 is visible to most people. Reference: Pantone Color Matching System guidelines.
Also check the printed artwork at 300 DPI at final size. That's the standard commercial print resolution. If your client's logo image is 3000 pixels wide, the maximum print width is 10 inches at 300 DPI. More pixels can be downsized; fewer pixels cannot be fixed.
For paper, use what the spec says. A card base of 80 lb cover (about 216 gsm) die-cuts cleanly and feels substantial. 65 lb text feels flimsy and can tear on detailed dies. If you're making a hanging ornament from cardstock, 100 lb cover (270 gsm) is a better choice but it cuts differently. The prototype tells you whether you need one pass or two.
Step 5: Cut in batches and inspect after every batch
We cut 50 sheets at a time, not 500. After every batch, I check the first card, the middle, and the last. Then I wipe the dies for paper dust. The first batch usually looks fine; the fourth is where the die gets warm, a foam layer shifts, or the pressure changes. (Ugh, those are the hidden failures that show up at assembly.)
For every 100 cards ordered, cut 110. The extra 10 are what save you when a ribbon slips or a die tears a corner. For a corporate client who needs 200 gift boxes for a December 22 event, we keep those spares until the courier is loading the van.
Step 6: Plan the assembly line for cards and ornaments
Assembly is where greeting cards and Christmas ornaments split into different routes. A greeting card with a Spellbinders Classic Mouse Christmas front is simple: die-cut front, foam adhesive on the back, attach to the card base, insert the printed inner sheet. An ornament set has more moving parts: the die-cut ornament, the hanging ribbon, the gift tag, the box insert, the outer sleeve.
Lay out the stations before you start. Station one attaches the ribbon. Station two mounts the ornament. Station three checks the tag spelling. Station four packs the box. Count at the end of each station. It sounds boring; it's the only thing that keeps a 1,000-piece order from feeling like chaos.
There's something satisfying about a perfectly executed rush order. After the stress, the panic, and the last-minute courier call, seeing the boxes line up with the client's count and no typos—that's the payoff.
Step 7: Pack with spares and a backup shipping plan
Pack finished cards and ornaments in kraft boxes or tissue. Put one or two extra ornament/card sets in a labeled envelope inside each master carton. If a client spots a typo at check-in, the spare saves the relationship. Label every carton with the client name, the event date, and 'open first' for the spare kit.
For shipping, book a courier with live tracking. If the date is critical, also book a backup pickup for the next morning. Last December we paid $125 extra for a standby pickup on a $4,500 order. We didn't need it, but it was the reason I slept that night.
Last mistakes to avoid
- Trusting memory. Write the spec, the die list, and the timeline down. 'We'll remember' fails at hour 14.
- Approving paper from a photo. Touch it, cut it, fold it.
- Not testing the full stack every time. Change one variable—paper, die, plate, machine pressure—and the result can change.
- Treating a small order differently. The $200 trial today can be the $15,000 contract next year. The supplier who says 'too small' loses that business.
Every rush order is a small orchestra. The conductor is a checklist. Spellbinders Christmas dies do the heavy lifting; the plan keeps the music from falling apart. Don't skip the prototype, don't trust the calendar without a buffer, and always, always cut spares.