-
Who This Checklist Is For
-
What You Will Need
-
The 7-Step Checklist
-
Step 1: Choose a die set that works for cards and small figures
-
Step 2: Match the cardstock to the die and machine
-
Step 3: Design the front around one focal point
-
Step 4: Test on a scrap piece before cutting the final sheet
-
Step 5: Score, fold, and build the card base
-
Step 6: Add a gift card pocket before you decorate
-
Step 7: Do a quality check in daylight
-
Step 1: Choose a die set that works for cards and small figures
-
How to Turn the Same Die Set into a Holiday Figurine
-
What to Avoid
-
Bottom Line
This checklist is for anyone who has ever stared at a blank card front and thought, I want this to feel personal, not handmade-awkward. It is also for the small shop owner who needs to make ten client gifts without losing the entire weekend.
I am a quality and brand compliance manager in the paper crafts industry. I review roughly 200 unique die-cutting products and finished samples a year. In early 2024, I rejected 7% of first production samples because die registration or paper edge finish was off. I have also rejected a one-off card in my own kitchen because the fold was one millimeter off center. Quality is not about order size.
So, how do you make a personalized gift card? You don't need a complicated system. You need a Spellbinders mini die cutting machine, a die set you actually like, good cardstock, and a checklist that stops you from rushing. Here is mine.
Who This Checklist Is For
Use this if you are making a one-off birthday greeting card, a set of corporate thank-you notes, or a small holiday table with a few Spellbinders paper crafts projects. Small run or big run, the steps are the same.
A vendor who took my $200 order seriously when I was starting out is the one I call now for $20,000 orders. The same idea applies to paper crafting. The card you make for one person can be as polished as a print shop's 1,000-unit run.
What You Will Need
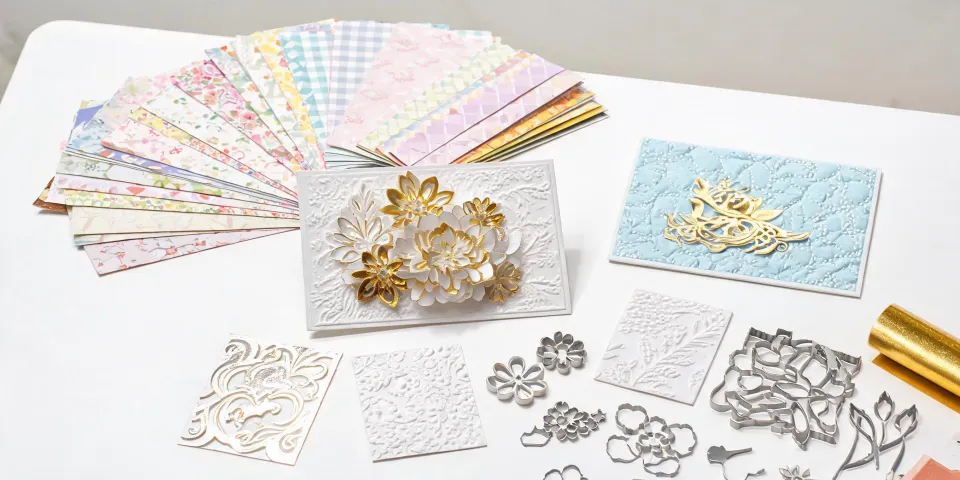
- Spellbinders mini die cutting machine (I use the Spellbinders Scout for most of my small-format work)
- Cardstock: 80 lb cover (216 gsm) for the base, lighter weight for detailed dies
- A die set with a focal image or sentiment
- Bone folder and scoring tool
- Liquid adhesive and a small piece of foam tape
- An envelope and, if you are adding a gift card, a rectangle die or a template
The 7-Step Checklist
Step 1: Choose a die set that works for cards and small figures
Do not buy a die set for one project. Choose one that can do more than one job. For example, the Spellbinders City Holiday collection has small architectural shapes that work on greeting cards and can become holiday figurines if you cut two or three layers and stack them. The Classic Mouse series works the same way: a simple shape can be a card focal point or a tiny table ornament.
Using a versatile die set is a no-brainer if you want to get more than one project from one purchase. It also keeps your design language consistent.
Step 2: Match the cardstock to the die and machine
The most common mistake I see in Spellbinders paper crafts is thick cardstock forced through a machine that was not set up for it. A mini die cutting machine can cut cleanly through 80 lb cover, but not every intricate die loves that weight.
Here is the industry rule I use in my own projects: start with 80 lb cover (216 gsm) for base layers and folds. That is business card weight, so it holds structure without feeling like cardboard. For small, detailed cuts, use 65 lb cover or lighter. For holiday figurines that need to stand up, 100 lb cover (270 gsm) works, but test whether the die cuts all the way through.
I learned this the hard way. The third time I ordered a die set and immediately cut into my best cardstock, I stopped. Now I test on scrap first. It takes two minutes. It's worth it.
Step 3: Design the front around one focal point
A personalized gift card is not a scrapbook page. You do not need to fill every square inch. Die-cut one sentiment or one image, layer it on a mat, and leave the rest alone. This is the difference between professional and busy.
When I review a finished card, I ask: can I tell where to look? If my eye travels around for more than three seconds, the design is too loud.
One rule I use: limit yourself to three paper layers. Base, mat, focal image. That's it.
Step 4: Test on a scrap piece before cutting the final sheet
This is the step I see skipped most often. Don't. Run a test sandwich through your Spellbinders mini die cutting machine with the same cardstock and the same shim stack. Check the cut edge. If it is fuzzy or half-cut, adjust before you touch your nice paper.
This step has saved me more times than I can count. One project, I lined up a sentiment die slightly crooked. On a scrap test, I noticed the letters were shearing at different depths. I fixed the shim and saved a whole sheet of expensive cardstock. Never expected a coin-sized test to do that. It did.
Step 5: Score, fold, and build the card base
Cutting does not make a card. Folding makes a card. Score the card base with a bone folder before folding. If you fold without scoring, the paper stretches and the card will not sit flat. I have rejected handmade cards that would not lie flat on a table. It is a simple test.
For a folded card, the fold line should be exactly halfway. I said 'exact midpoint' to a colleague once. They heard 'somewhere in the middle.' Result: a batch of cards with different-sized panels.
Not great, but workable? No. I redid them.
Step 6: Add a gift card pocket before you decorate
If you are making a personalized gift card that will hold a physical gift card, make the pocket before you attach the front. Measure the gift card first. A standard gift card is roughly 3 3/8 by 2 1/8 inches. Add at least an eighth of an inch of clearance on each side. I speak from a mistake: I said 'standard size pocket.' They heard 'same size as the gift card.' Result: the card did not slide in. Now I make a template from the actual card.
Pocket assembly: die-cut a rectangle about a quarter of an inch wider and a quarter of an inch taller than the gift card. Score the bottom and side edges, fold them under, and adhere them to the inside of the card. Leave the top open. Test with the real card before you close everything up.
Step 7: Do a quality check in daylight
Hold the finished card at arm's length. Look at it in natural light. Check for smudges, stray fibers, uneven folds, or glue that has seeped out. Flip the card over and make sure the inside message is straight.
If you are matching a company color for a corporate gift, Pantone's Color Matching System guidelines set the tolerance for brand-critical colors at Delta E below 2. Delta E of 2 to 4 is noticeable to trained observers; above 4 is visible to most people. You do not need a spectrophotometer for a handmade card. But you do need to know that 'navy' can look different in a dark room than it does in daylight.
If you printed a photo or custom text, make sure your image is 300 DPI at final size. A 3000 by 2000 pixel image prints at 10 by 6.67 inches at 300 DPI. Any less, and a close-up face can look soft.
How to Turn the Same Die Set into a Holiday Figurine
This is my favorite part of Spellbinders paper crafts. The die set you used for the card can also make a holiday figurine.
- Cut two or three copies of the main shape, but keep the tabs and unused cut pieces.
- Score the fold tabs and fold them inward.
- Layer the shapes with liquid adhesive, letting the scored tabs create a dimensional body.
- Use foam tape only for small details like a scarf or hat, not for the main joints.
I have a small Classic Mouse figure on my desk that started as a card topper. It did not need special equipment. Same machine. Same type of paper.
What to Avoid
- Do not use heavyweight paper in a machine rated for lighter cardstock unless you know the die can handle it. It can jam or leave a ghost mark.
- Do not use high-tack adhesive near visible edges. Use a precision tip and a small amount.
- Do not make all your cards identical without checking finished samples. I have seen a neat batch become a sloppy batch because nobody looked at card number seven.
Bottom Line
How do you make a personalized gift card? Start with a Spellbinders mini die cutting machine, one versatile die set, and good cardstock. Follow the steps: choose a flexible die, test the paper, design with restraint, test again, score properly, build the pocket, and inspect.
And if you are only making one card, treat it like a sample. If you are making twenty, treat each one like the only one. I review quality for a living, and the same standard applies: small doesn't mean careless.